Raspberry Pi Image
The fastest way to get Smart Panel running on a Raspberry Pi. Pre-built images include everything — just flash, boot, and configure WiFi.
Choose Your Image Variant
Flash the Image
Download the image
Go to GitHub Releases and download the image for your variant. Files are named:
smart-panel-{variant}-{version}-arm64.img.xzWhere {variant} is aio, server, or display.
Flash using Raspberry Pi Imager
Open Raspberry Pi Imager and follow these steps:
1. Select your Raspberry Pi model
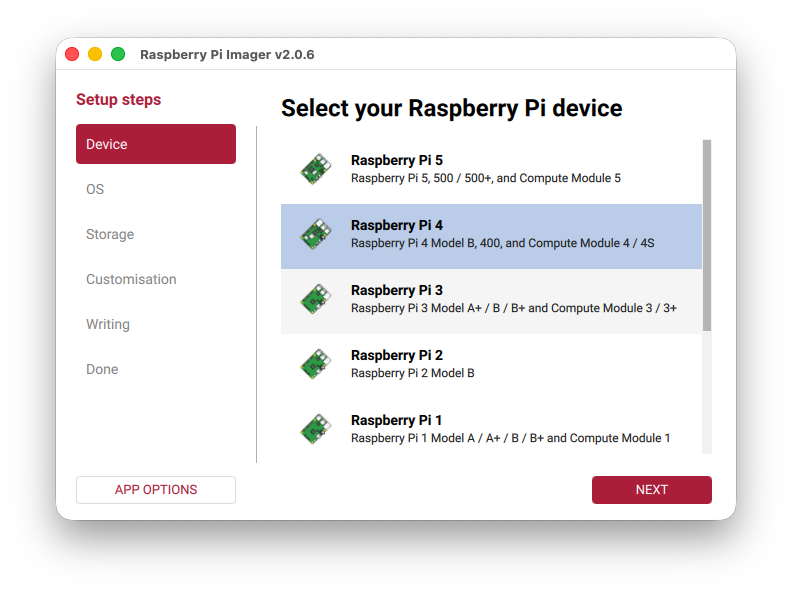
2. Choose the downloaded image — select “Use custom” and pick the .img.xz file
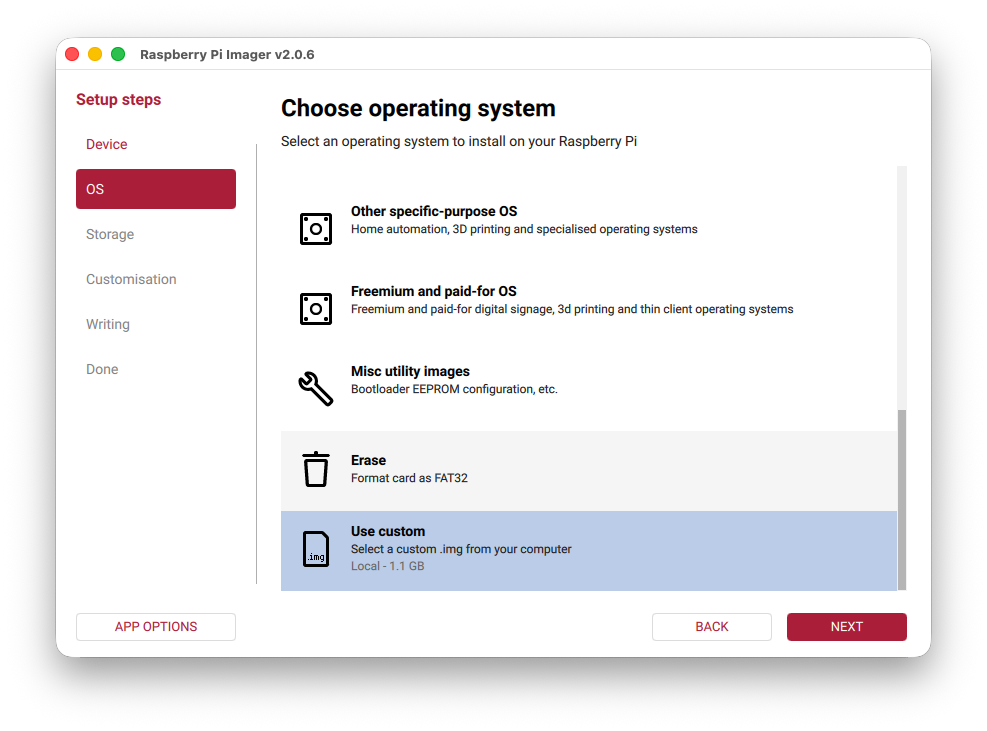
3. Select your SD card
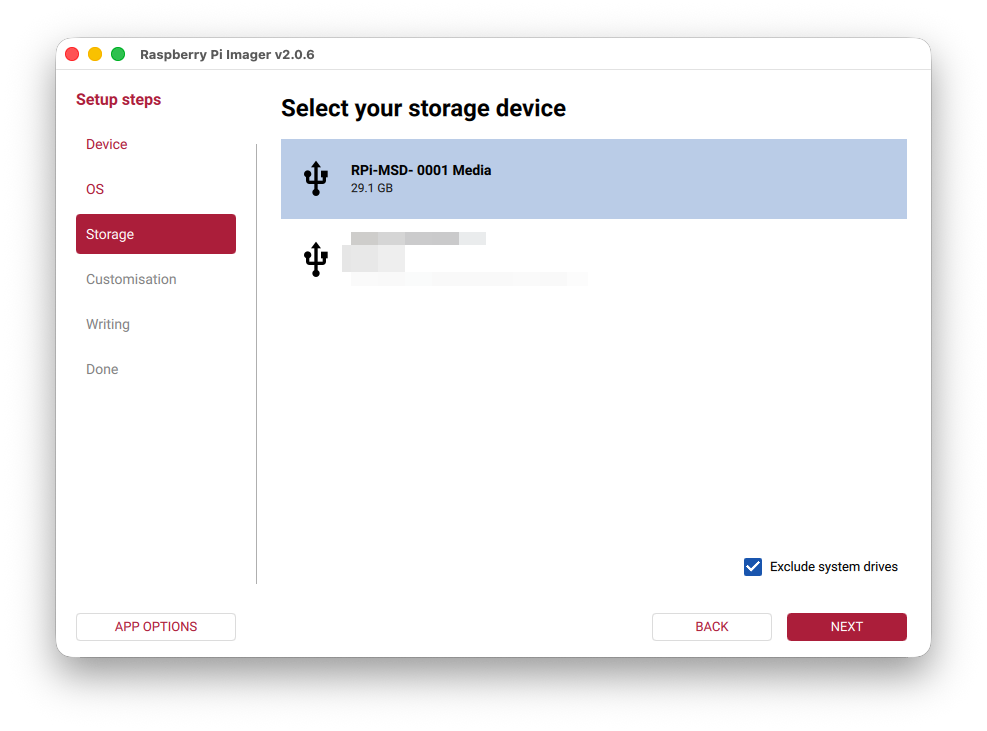
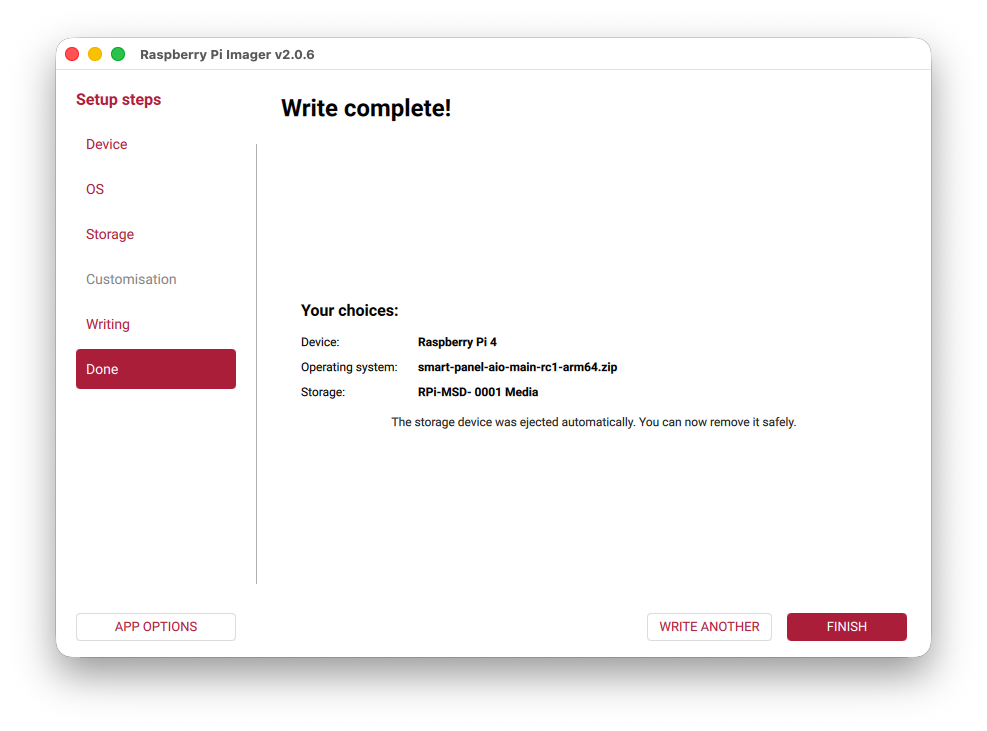
4. Review the summary and click Write

5. Confirm that all data on the SD card will be erased
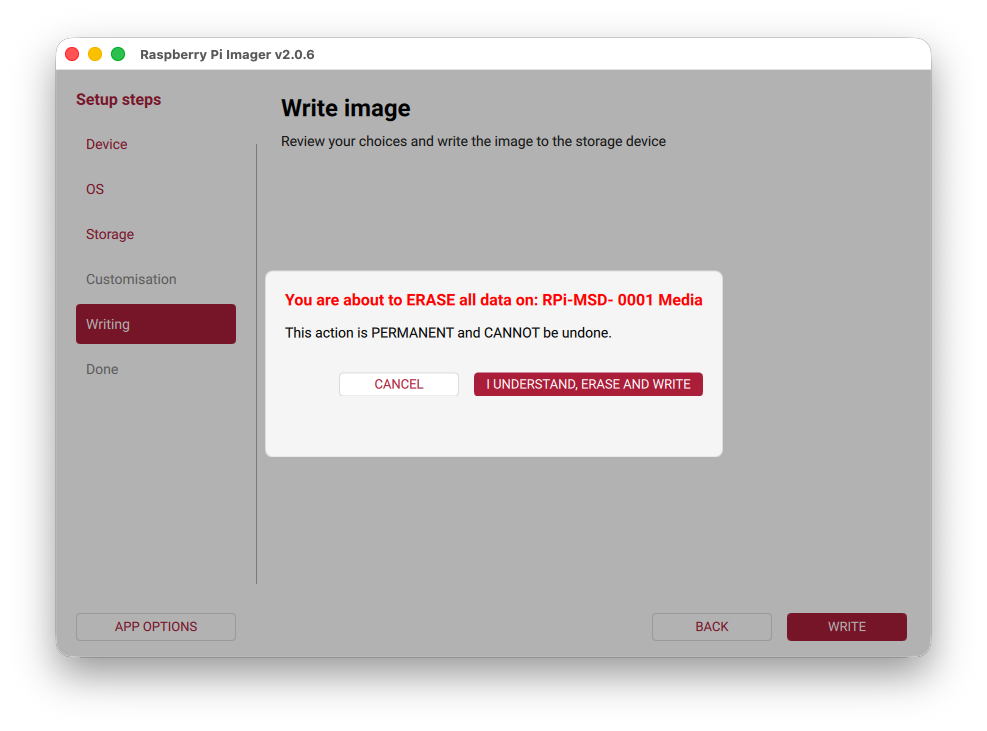
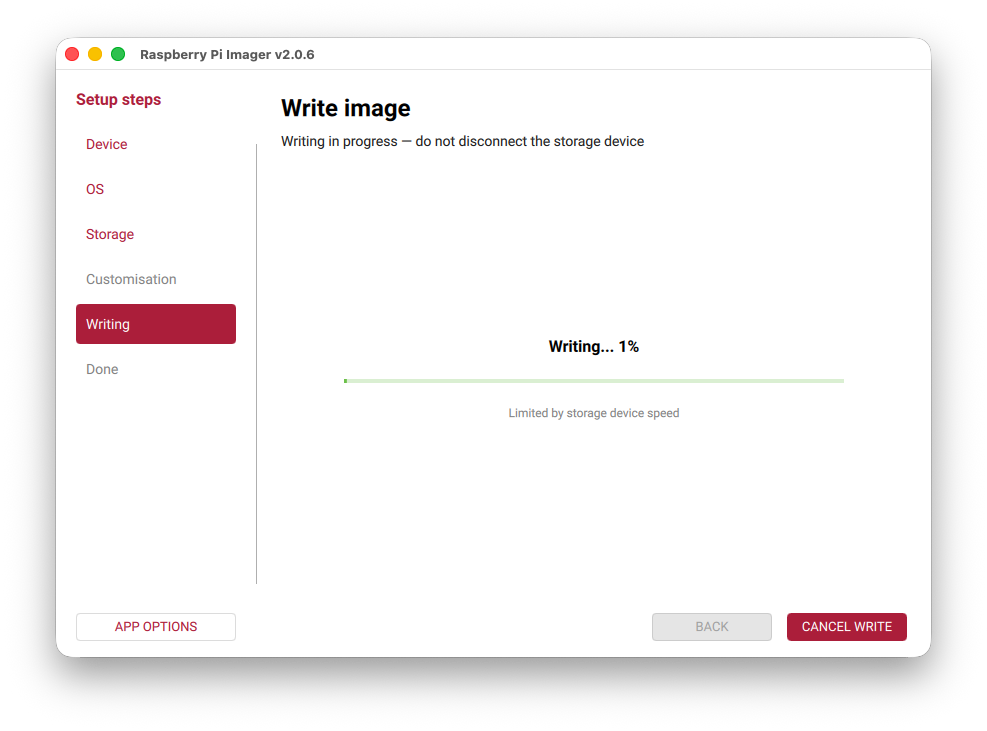
6. Wait for the image to be written
7. Done — remove the SD card
Boot the Pi
Insert the SD card into your Raspberry Pi and power it on.
Images are ARM64 only — compatible with Pi 3B+, Pi 4, Pi 5, and Pi Zero 2W (64-bit).
Configure WiFi
Option A: Captive Portal (no computer needed)
On first boot, if no WiFi is configured, a WiFi hotspot named SmartPanel-XXXX appears
(password: smartpanel).
- Connect from your phone — a setup page opens automatically
- Enter your WiFi credentials, country code, and optional hostname/timezone
- Click Save & Connect — the device joins your network
See Captive Portal for full details.
Option B: Boot partition config file
Before first boot, create a file called smart-panel.conf on the SD card’s boot partition:
WIFI_SSID=MyNetwork
WIFI_PASSWORD=mypassword
WIFI_COUNTRY=US
HOSTNAME=smart-panel
TIMEZONE=America/New_York
All fields are optional. If WiFi fields are present, the captive portal is skipped.
First Boot
What happens on first boot:
- Root partition auto-expands to fill the SD card
- WiFi connects (via captive portal or boot config)
- Native modules are compiled (may take a few minutes on first boot)
- Database is migrated
- Services start automatically
First boot takes 2–5 minutes depending on your Pi model. A log is written to
/boot/firmware/smart-panel-firstboot.log for diagnostics.
Post-Installation
Default SSH Credentials
The pre-built image ships with the following default credentials:
- Username:
smartpanel - Password:
smartpanel
On first SSH login, you will be prompted to change the default password.
Access the Admin Interface
From another device on the same network, open a browser:
http://smart-panel.local:3000Or use the device’s IP address: http://<device-ip>:3000
If you configured a custom hostname during setup, replace smart-panel with that hostname.
You can find the IP address with hostname -I on the device.
View Logs
# Backend
sudo journalctl -u smart-panel -f

# Display (AIO/Display variants)
sudo journalctl -u smart-panel-display -f

# First-boot log (useful for diagnosing startup issues)
cat /boot/firmware/smart-panel-firstboot.log
Included Services & Tools
The Raspbian image ships with several pre-configured systemd services and CLI tools. Not all are available on every variant.
Systemd Services
| Service | Variants | Description |
|---|---|---|
smart-panel | Server, AIO | NestJS backend and admin UI |
smart-panel-display | Display, AIO | Flutter-pi display application |
smart-panel-discovery | Display, AIO | mDNS discovery proxy for backend detection |
smart-panel-portal | All | WiFi captive portal (runs on first boot when no WiFi is configured) |
smart-panel-wifi-watchdog | All | Re-activates the captive portal if WiFi drops for more than 5 minutes |
smart-panel-auto-rotate | Display, AIO | Accelerometer-based screen rotation (disabled by default, reTerminal CM4 only) |
smart-panel-firstboot | All | One-time initialization on first boot |
Check any service with:
sudo systemctl status <service-name>Auto-Rotate (Display & AIO)
On supported hardware (Seeed reTerminal CM4 with built-in accelerometer), the display can automatically rotate when the device is physically turned.
# Enable auto-rotation
sudo smart-panel-auto-rotate enable

# Disable auto-rotation
sudo smart-panel-auto-rotate disable

# Check current status and accelerometer readings
smart-panel-auto-rotate status
Auto-rotate is disabled by default. Once enabled, it monitors the accelerometer and restarts the display service when an orientation change is detected.
Auto-rotation requires the LIS3DHTR accelerometer at /sys/devices/platform/lis3lv02d/position.
On hardware without this sensor, the enable command will report that the accelerometer is not found.
Display Configuration (Display & AIO)
The display service reads its configuration from /etc/smart-panel/display. You can adjust the physical
display dimensions (which control UI scaling — smaller values produce larger UI elements) and the screen rotation:
| Variable | Description | Example |
|---|---|---|
FB_DISPLAY_DIMENSIONS | Physical display size as width_mm,height_mm | 90,54 |
FB_DISPLAY_ROTATION | Screen rotation in degrees | 0, 90, 180, 270 |
Seeed reTerminal 5” — the auto-detected dimensions (~108x65mm) result in small UI elements. For a better experience, use these recommended values:
sudo sed -i 's/^FB_DISPLAY_DIMENSIONS=.*/FB_DISPLAY_DIMENSIONS=90,54/' /etc/smart-panel/display && sudo systemctl restart smart-panel-displayOfficial Raspberry Pi 7” Touchscreen:
sudo sed -i 's/^FB_DISPLAY_DIMENSIONS=.*/FB_DISPLAY_DIMENSIONS=155,86/' /etc/smart-panel/display && sudo systemctl restart smart-panel-displayLeave FB_DISPLAY_DIMENSIONS empty to use auto-detection (works well for most other displays).
To set rotation manually (e.g. upside-down mount):
sudo sed -i 's/^FB_DISPLAY_ROTATION=.*/FB_DISPLAY_ROTATION=180/' /etc/smart-panel/display && sudo systemctl restart smart-panel-displayWiFi Captive Portal (All Variants)
The captive portal automatically starts when no WiFi is configured. If you need to reconfigure WiFi later:
# Manually trigger the captive portal
sudo rm /var/lib/smart-panel/.wifi-configured
sudo systemctl restart smart-panel-portal
The WiFi watchdog also re-activates the portal automatically if WiFi is unreachable for more than 5 minutes (and no Ethernet is connected).
Backend Configuration (Server & AIO)
Backend configuration is stored in /etc/smart-panel/environment:
| Variable | Default | Description |
|---|---|---|
FB_BACKEND_PORT | 3000 | HTTP server port |
FB_DB_PATH | /var/lib/smart-panel/data | SQLite database directory |
FB_CONFIG_PATH | /var/lib/smart-panel/config | Configuration files directory |
FB_TOKEN_SECRET | Auto-generated | JWT signing secret (generated on first boot) |
Apply changes with:
sudo systemctl restart smart-panelFile Locations
| Path | Description |
|---|---|
/opt/smart-panel/current/ | Backend application (symlink to versioned directory) |
/opt/smart-panel-display/current/ | Display application (symlink to versioned directory) |
/var/lib/smart-panel/data/ | SQLite database |
/var/lib/smart-panel/config/ | User configuration files |
/etc/smart-panel/ | System configuration (environment, display settings) |
/boot/firmware/smart-panel-firstboot.log | First-boot diagnostics log |
What’s Next?
Your Smart Panel is running. Head over to Onboarding to create your admin account and start configuring your dashboard.