Devices
Devices are the heart of your Smart Panel setup. Each device represents a physical or virtual component of your smart home — such as a light, thermostat, sensor, or media player.
Most devices are created automatically by plugins. If you’re using an integration like Home Assistant, Shelly, or Zigbee2MQTT, your devices will appear in the panel after the plugin syncs. Manual creation is only needed for Third-party devices.
How Devices Are Structured
Every device follows a three-level hierarchy:
- Device — the physical or virtual unit (e.g., Living Room Lamp)
- Channels — functional capabilities of the device (e.g., light, temperature, battery)
- Properties — individual data points or controls within a channel (e.g., power, brightness, color)
This structure is consistent across all device types — whether created manually or synced by a plugin.
Device List
Navigate to Devices in the admin sidebar to see all your devices.
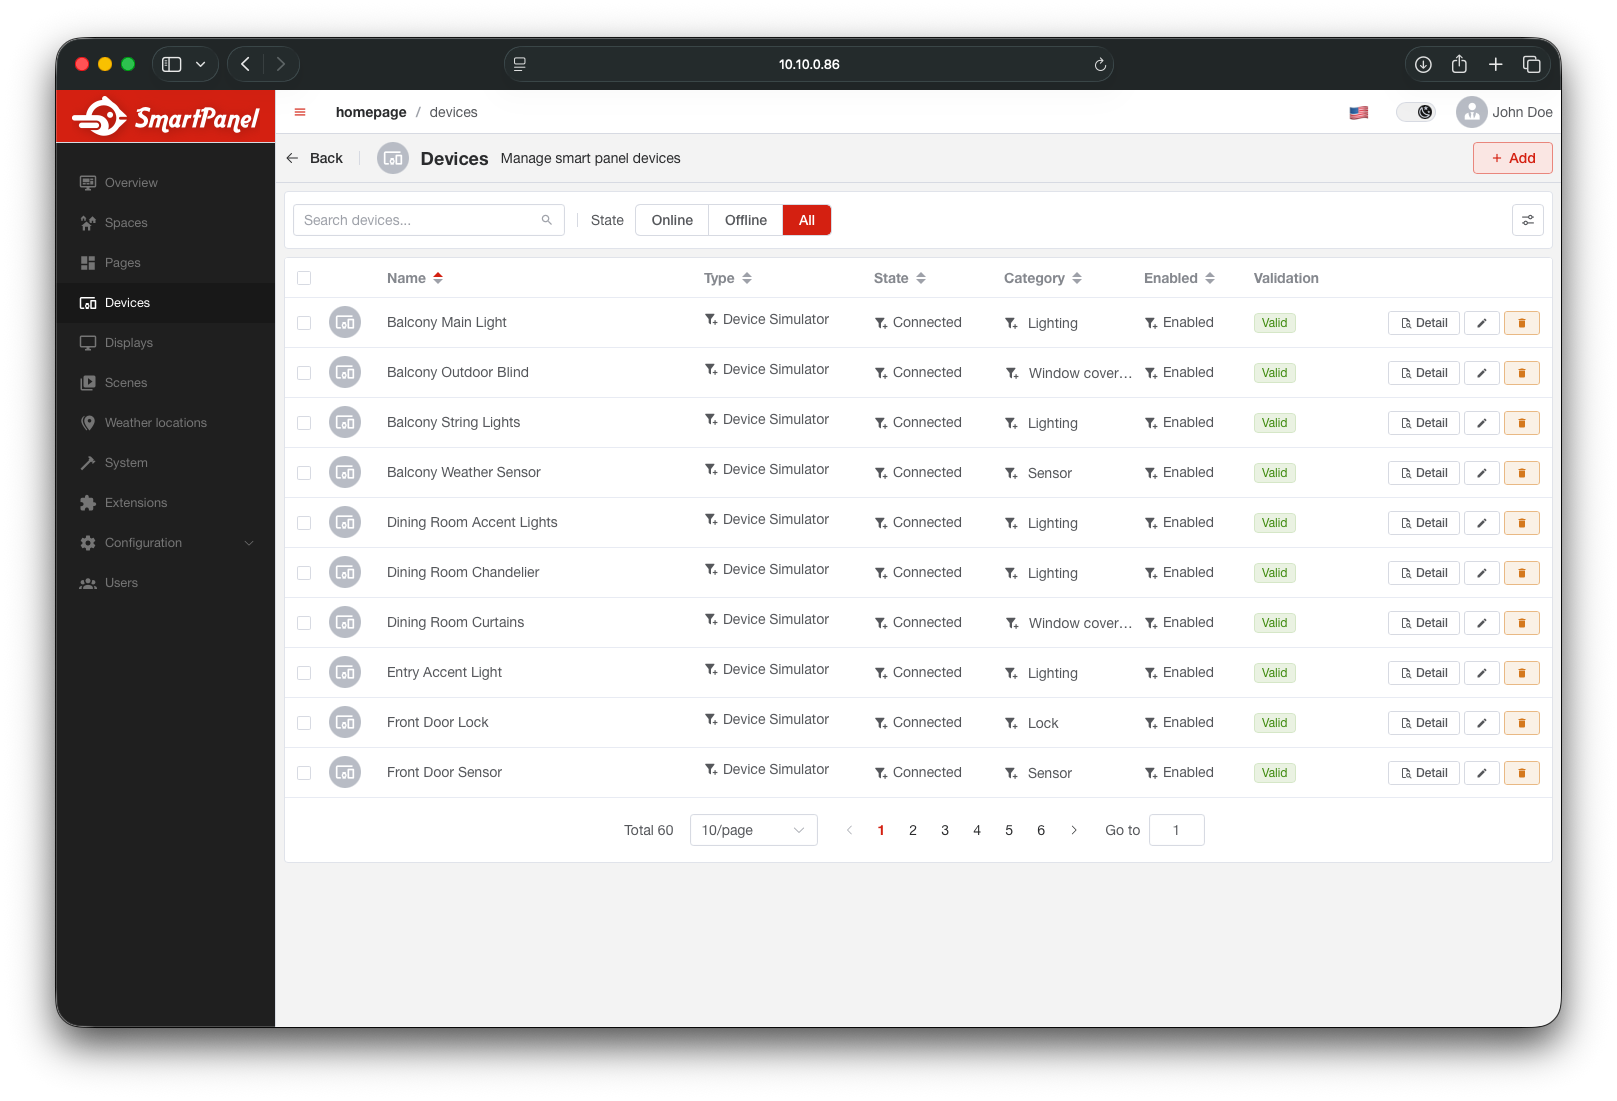
From here you can view device details, add new devices, or manage existing ones.
Adding a Device Manually
If you need to create a device that isn’t managed by a plugin, you can add it manually.
Click + Add Device
In the Devices section, click the + Add Device button in the top-right corner.
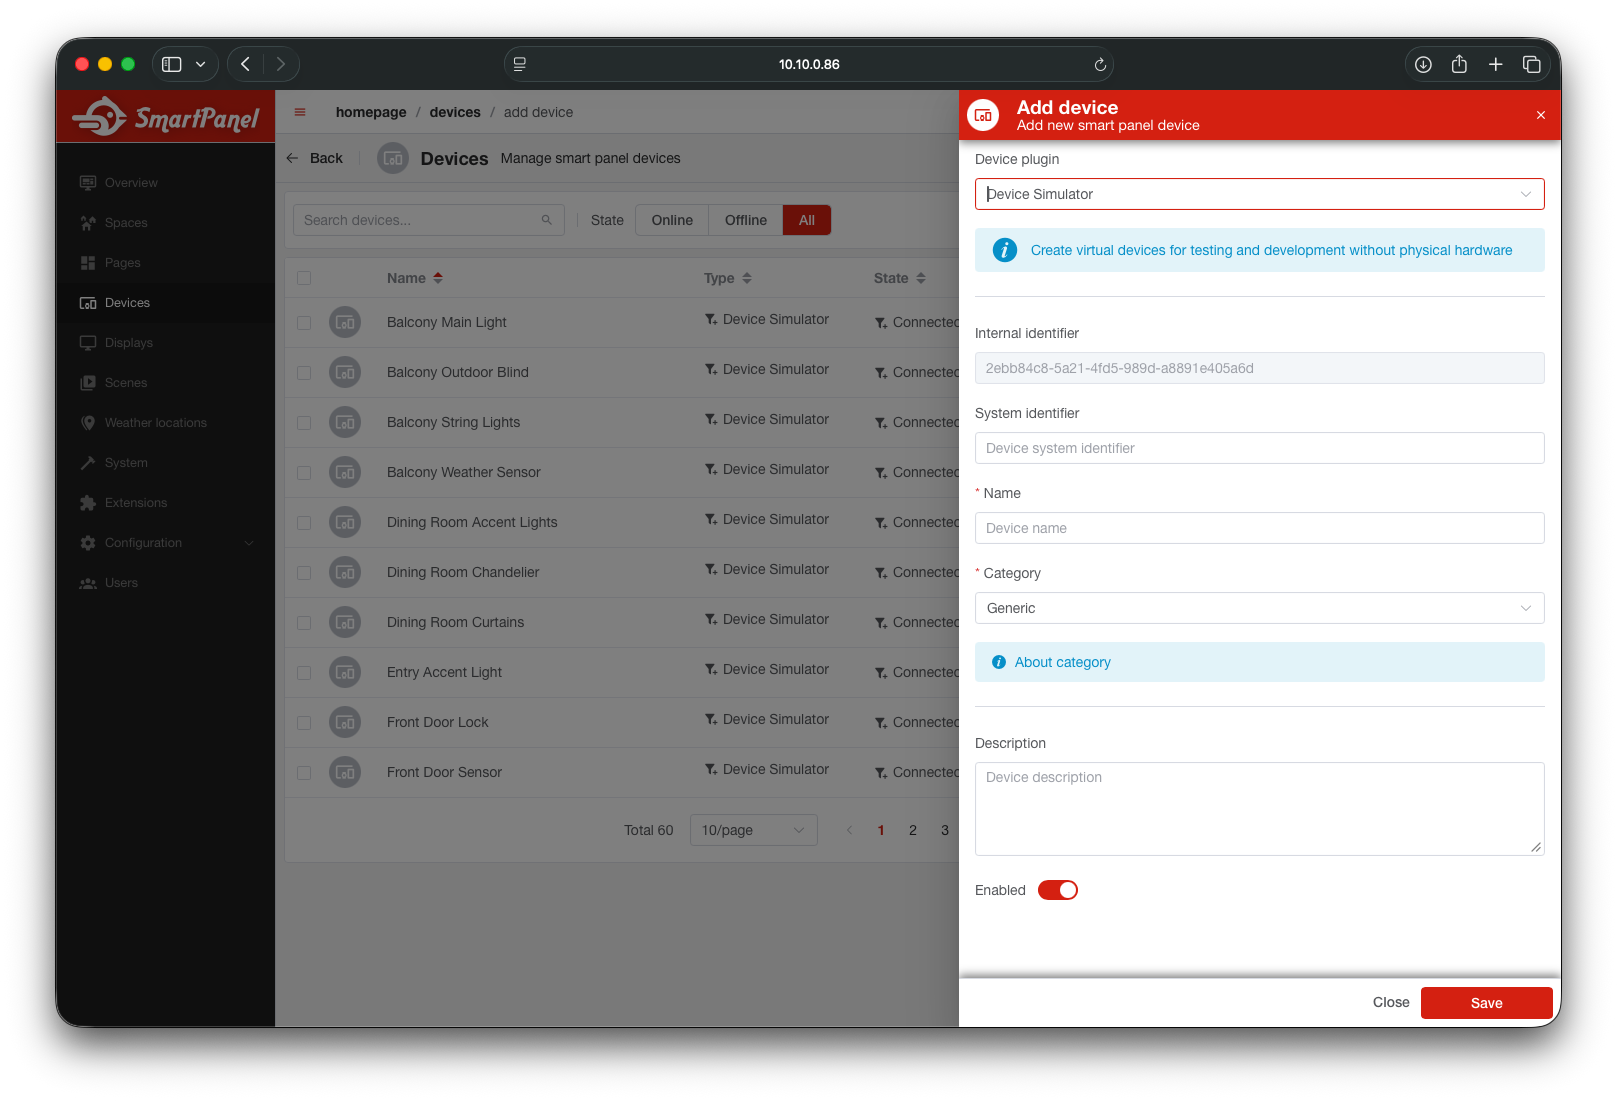
Select Device Type (Plugin)
Choose the source for the device — this defines how the panel communicates with it:
- Third-party — for manually created devices controlled via the API
- Home Assistant — for devices synced from your HA setup
- Shelly, Zigbee2MQTT, and others — depending on installed plugins

Fill in Device Details
Enter the basic information:
- Name — friendly display name (e.g., Living Room Lamp)
- Description (optional) — a short note about the device
- Category — the device type, like light, thermostat, or camera
Device categories and their required channels are defined in the System Architecture section.
Device Detail
Click on any device to see its full configuration — including its channels and their properties.
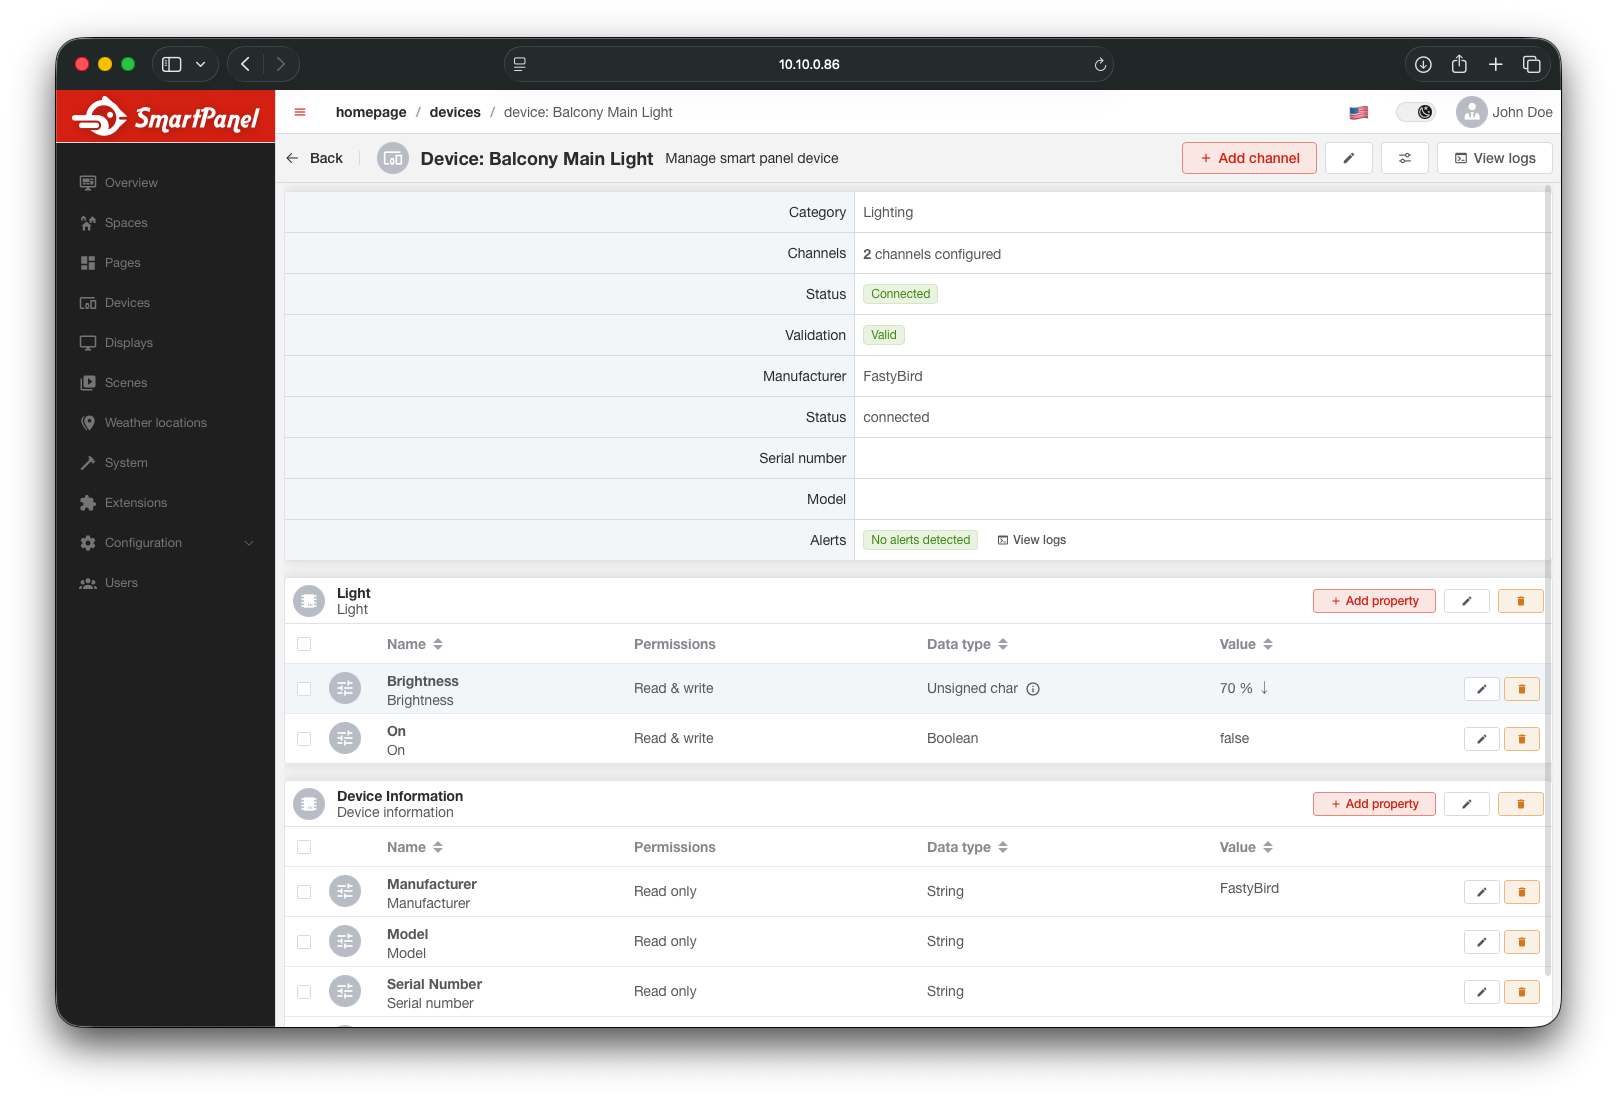
Channels
Channels define what a device can do or measure — like turning a light on, reporting temperature, or adjusting fan speed. Each device includes one or more channels based on its functionality.
For plugin-managed devices, channels are created automatically based on the integration’s device capabilities.
Adding a Channel
Open a Device
In the device detail view, switch to the Channels tab.
Click + Add Channel
This opens the channel creation dialog.
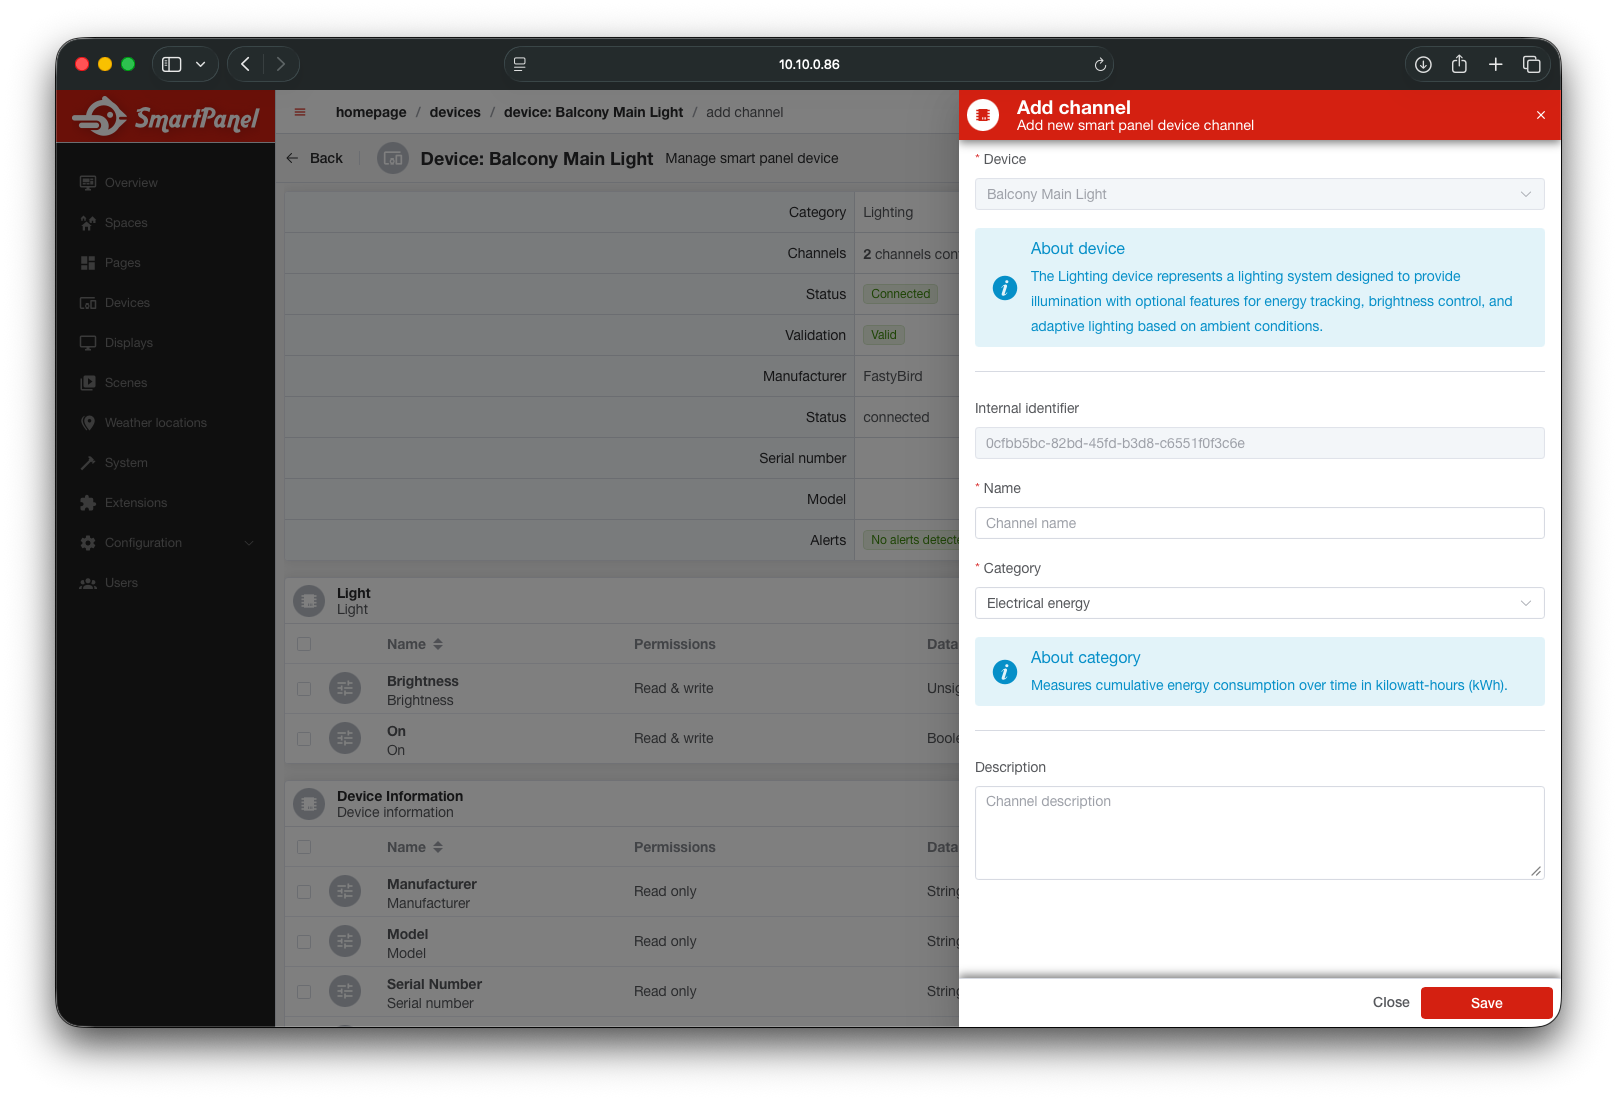
Fill in Channel Details
- Name — the name used internally (e.g.,
light,temperature,valve) - Category — choose from a list of supported channel types
- Description (optional) — short description of the channel
The channel category determines which properties can be used. Check the Supported Channels reference for details.
Properties
Properties define the actual data points or controls inside a channel — like a light’s power state, a thermostat’s target temperature, or a sensor’s battery level.
Adding a Property
Open a Channel
From the device detail, select a channel to see its properties.
Click + Add Property
This opens the property creation dialog.

Define the Property
- Name — internal identifier (e.g.,
state,brightness,humidity) - Data Type — type of value (
boolean,float,enum, etc.) - Unit — optional unit of measurement (
°C,%,W, etc.) - Permissions — define if it’s readable, writable, or both
- Format (optional) — additional structure (e.g., for enums)
The form may vary depending on the selected channel category. In some cases, fields like data type or format are pre-filled by the system and cannot be changed manually.
What’s Next?
With your devices configured, you can: